
One of the biggest problems when scanning color negatives is, to get the color and contrast right. While scanning software often addresses this issue, I know many users struggle to get colors right. There is a very good Adobe Lightroom plugin for a while now that helps the user to create wonderful scans from negatives. It was initially introduced for converting camera scans, but it can also be very helpful for converting scans from your flatbed or dedicated film scanner. Nate Johnson the creator of Negative Lab Pro (NLP) has updated the plugin to Version 2.1.2 which now enables you to effortlessly combine the power of a real scanner with the beauty and handsomeness of a really cool plugin. In this short tutorial I go through the required steps to give you the freedom of a non-destructive workflow in Lightroom combined with a very solid negative conversion tool.
Read More
Scanning "NORMS - West Hollywood"
A BASIC TUTORIAL ON HOW TO SCAN KODAK PORTRA 400 FILM WITH SILVERFAST 8 AND PHOTOSHOP
"NORMS - West Hollywood" is a night photograph I took a couple of weeks ago with my Hasselblad 500 and a Carl Zeiss 50mm Distagon f/4 lens of the famous NORMS restaurant. This will be part of a series of images focusing on the architecture of restaurants and shops in greater Los Angeles. In this short tutorial I will show you how to make a good looking scan in just a few simple steps in SilverFast 8 and Photoshop.
The aesthetics I try to achieve are similar to scans that my lab is doing with a Fuji Frontier mini-lab scanner. While the Epson V700 uses a significantly different technique, I am still able to re-scan some frames, especially if I need them at a higher resolution, that look similar or close to the rendition of the aforementioned scanner.
Read MoreColor Negative Scanning Example No.2
Back again with a color negative film scanning example. I had to re-scan this image for a book project as the lab scan did not have enough resolution for the book and therefore I thought this would be an intersting example for everybody interested in scanning film.
In the video I show the steps I do in SilverFast HDR Studio. SilverFast HDR Stduio works with linear scans and if you are interested in how you make these scan check my previous blog post for a detailed explanation.
Read MoreHow to make linear scans with SilverFast 8.8
This is going to be a short post. In order to use SilverFast HDR Studio as an archival workflow solution as well as for a optimized FineArt workflow I find the idea of creating linear scans fascinating. What we basically do is splitting the workflow into two parts. First is the scanning process and second the post-processing that is required for every scan. During the scanning we make sure that we capture all relevant data from film. In order to do so, we do not alter the data in any way and we save the file as a linear 16bit Tiff file.
Read MoreScanning Example - Castro Night Shot
After my video tutorial in the last post, I thought a short follow up post with a detailed example would be helpful. So, no video today, but some further explanations on how I scanned the photograph below. But just in case you have missed the video, I highly recommend going back and watch it. It will give you a good overview of all the tasks required during the scanning process.
Read MoreScanning Color Negative Film
I always wanted to write about scanning color negative film. Now I was finally able to put together this site with lots of useful information to get started with scanning color film. The main part of this section is the video tutorial that can be found below.
While positive film seems so much easier to scan, obviously you can see the positive image already, it seems some kind of mystery to scan print film. The first thing you hear is, that you cannot get accurate results due to the orange mask. The orange mask and the fact that the image is inverted are of course two complications we have to deal with, but these challenges are not as complicated as you might think. The biggest problem is that we need to accept the fact that there is no accurate or "correct" scan that we retrieve from the scanner. Even during darkroom printing all prints were interpretations. The old Ansel Adams quote about the score and the performance is also true for color film. Once you have accepted this, you are good to go!
Make you own scans, your own interpretations, give the scans your artistic voice. That is what makes home scanning so fascinating.
Read More
Making a digital black & white Master Print from a negative (PartIII)
In my previous post I mentioned that I try to replicate the work done in the traditional wet darkroom. Today I would like to introduce these techniques to you and show you their digital equivalent.
Read More
Hasselblad 500cm - Ilford FP4 PLUS - developed by viertelvor8 lab in Berlin - 4 minutes exposure at f/8
Making a digital black & white master print from an analog negative (Part I)
From a negative to a black & white "Master-Print-File"
Black and White printing has always been a mastery that requires many years of learning, knowledge and dedication. Nothing will ever compete with a carefully printed black and white print. However acquiring these skills, maintaining a darkroom and finding the time to print regularly exceeds the possibilities of most people. Digital made things easier, but still it can be regarded a mastery to skillfully make a digital master print file from an analog negative. This tutorial will show you in detail how to scan black and white medium format negatives and than process them in Adobe Lightroom like the old masters did it in the darkroom.
Read More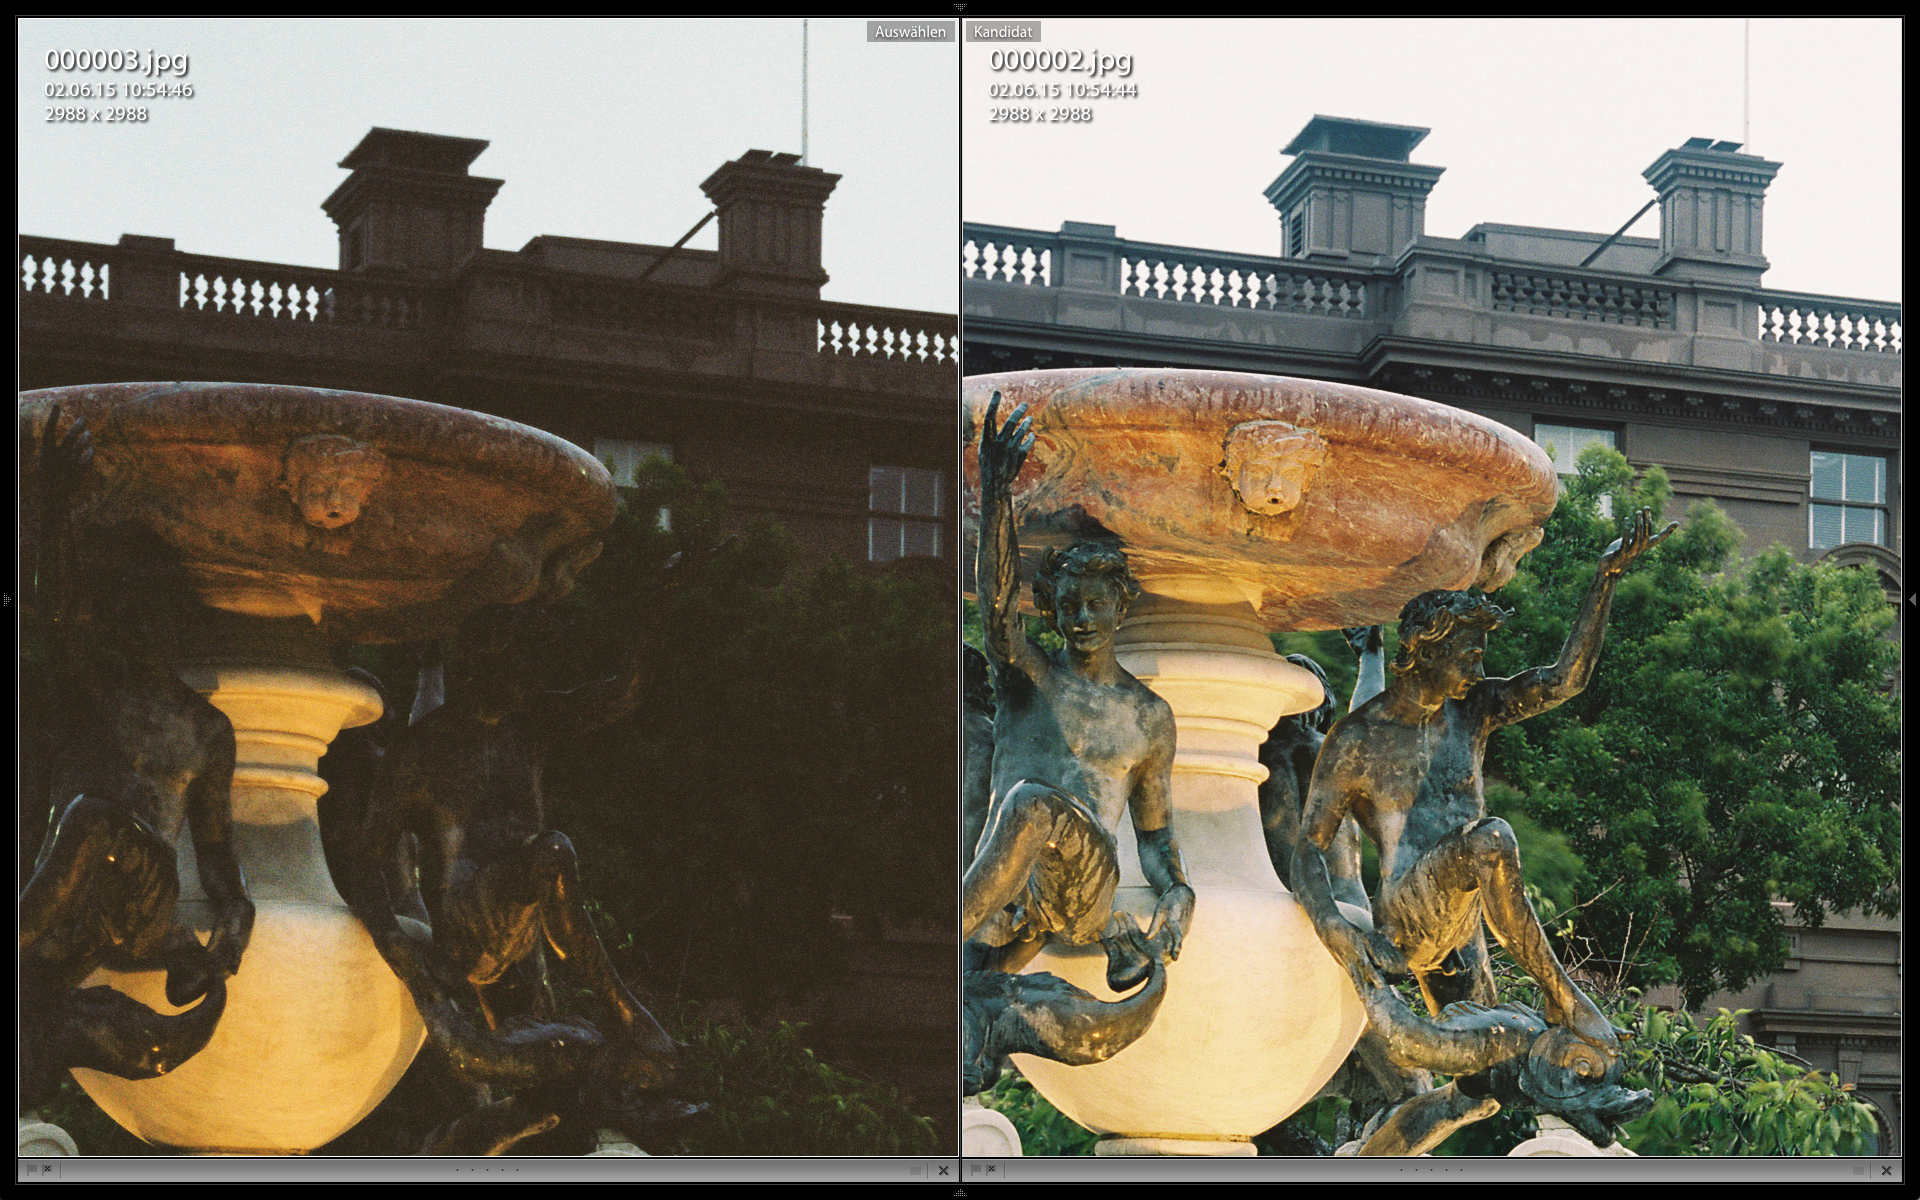
Shadow detail comparison of an underexposed negative (left) and overexposed negative (right).
How Exposure affects scanning of color negative film
The way we expose film has a tremendous amount on the quality and mood of the final photograph. Of course exposure affects image brightness and contrast, but also quality and color.
Carmencita Film Lab and photographer Johnny Patience both did a wonderful exposure series to demonstrate the effect of under and overexposure to film. Please follow this link to check their series and read their recommendations. You can also find a good film guide from "Mein Film Lab" which explains a lot about the different characters of film. Unfortunately it is only available in German so far.
Read More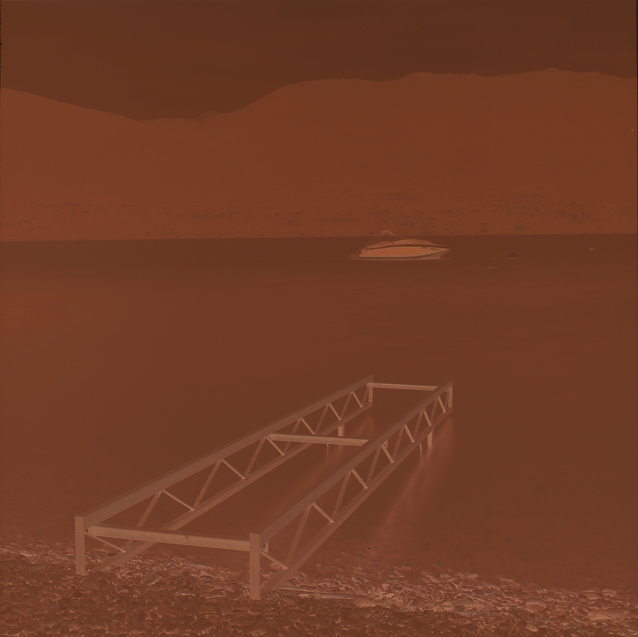
Understanding Color Negative Film For Scanning
Learn the most important facts about color negative film
The art of getting a good color print from a negtaive seems to be a dying craft. The modern photographer who still shoots color film normally uses a scanner to get to the desired print. The scanning process is much cheaper, less labor-some and more flexible. In order to learn what is required to get descent scans from color negs, you need to be aware of some important facts.
Read MoreSigned, Sealed, Delivered...
From Scan to Print, a workflow example
I just recently received these wonderful Fuji Frontier scans from the "Mein Film Lab" in Germany and I was immediately hooked by the shot I took during sunset at a lovely hidden beach at the "Lagoo Maggiore".
Soon I decided to explore whether I could make similar scans at home with my Epson V700 scanner and Silverfast 8. Here is brief explanation of my workflow:
Read More