How to work with linear raw scans to get good results
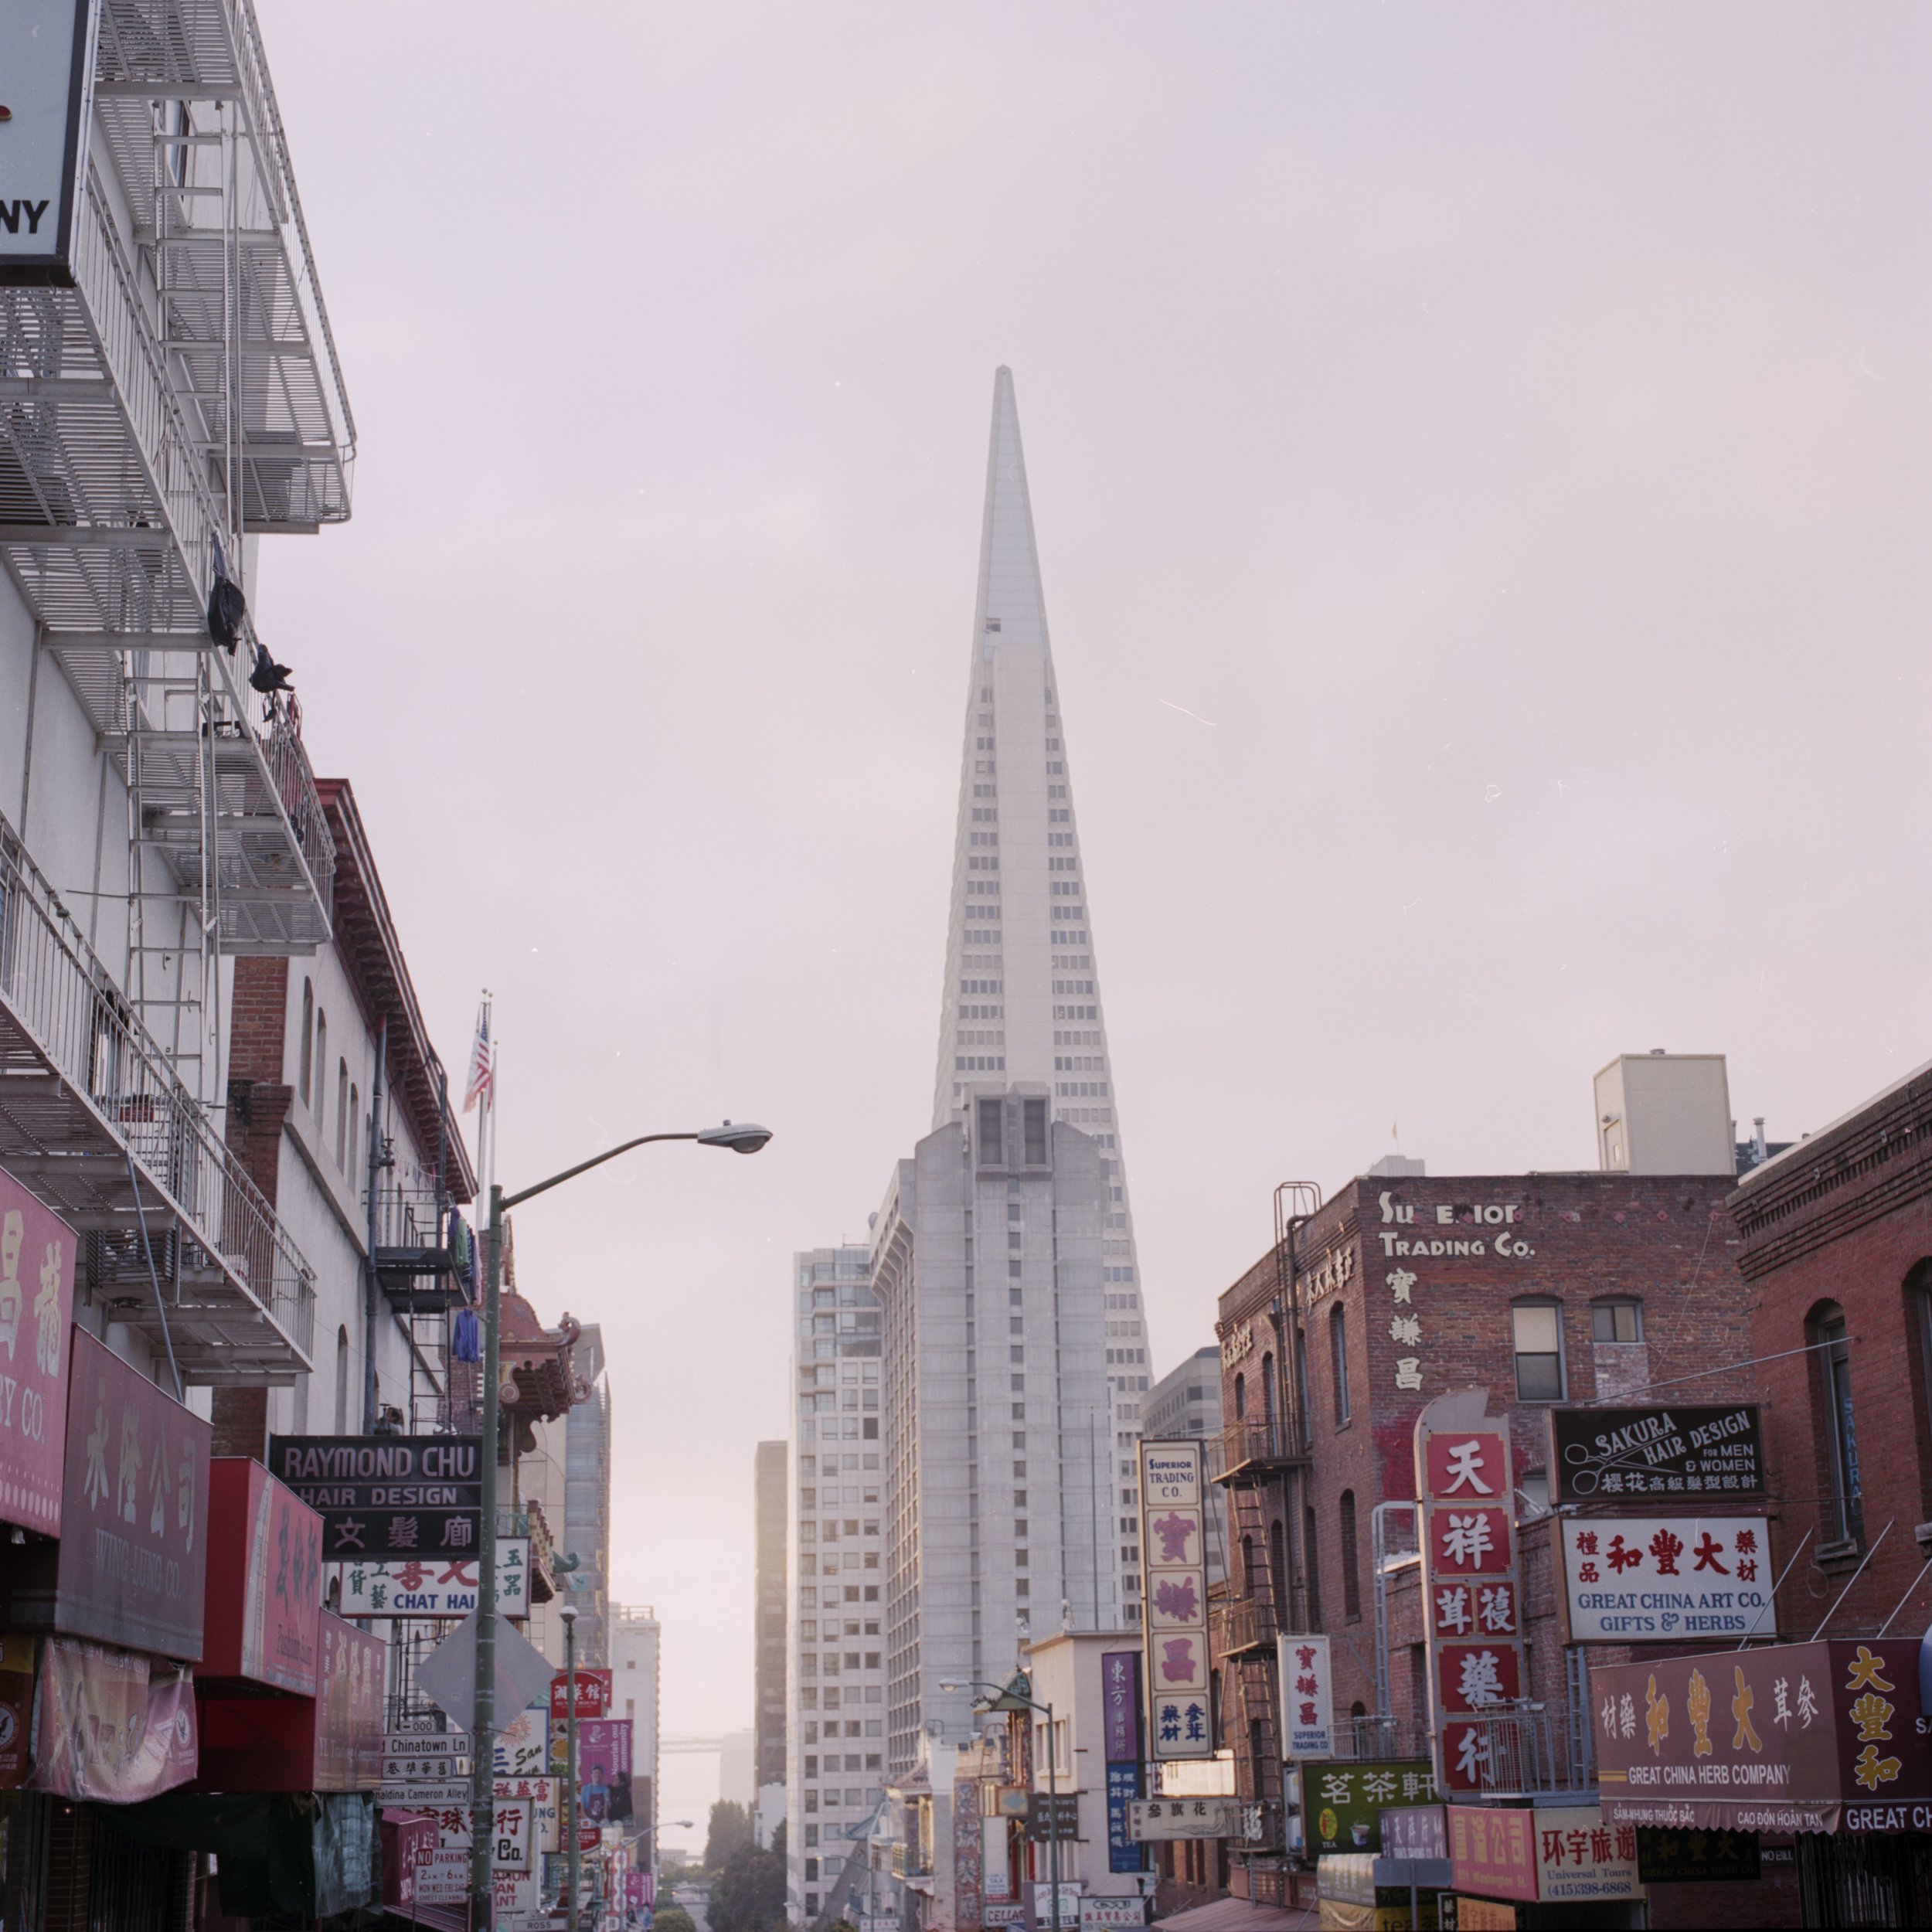
Back again with a color negative film scanning example. I had to re-scan this image for a book project as the lab scan did not have enough resolution for the book and therefore I thought this would be an intersting example for everybody interested in scanning film.
In the video I show the steps I do in SilverFast HDR Studio. SilverFast HDR Stduio works with linear scans and if you are interested in how you make these scan check my previous blog post for a detailed explanation.
Scan Log
- Negafix: Standard | Exposure 0.0 | Tolerance 10
- Color Correction Cyan -10 | Magenta 0 | Yellow -40
- Midtone +10 | Shadow Contrast +20
- USM auto | iSRD auto | GANE medium
Note: Color balancing is more or less subjective and you can get many many other results depending on your eye and vision. This is juts my personal take and I even have to admit the final file for my book is slightly different to the one in the video.
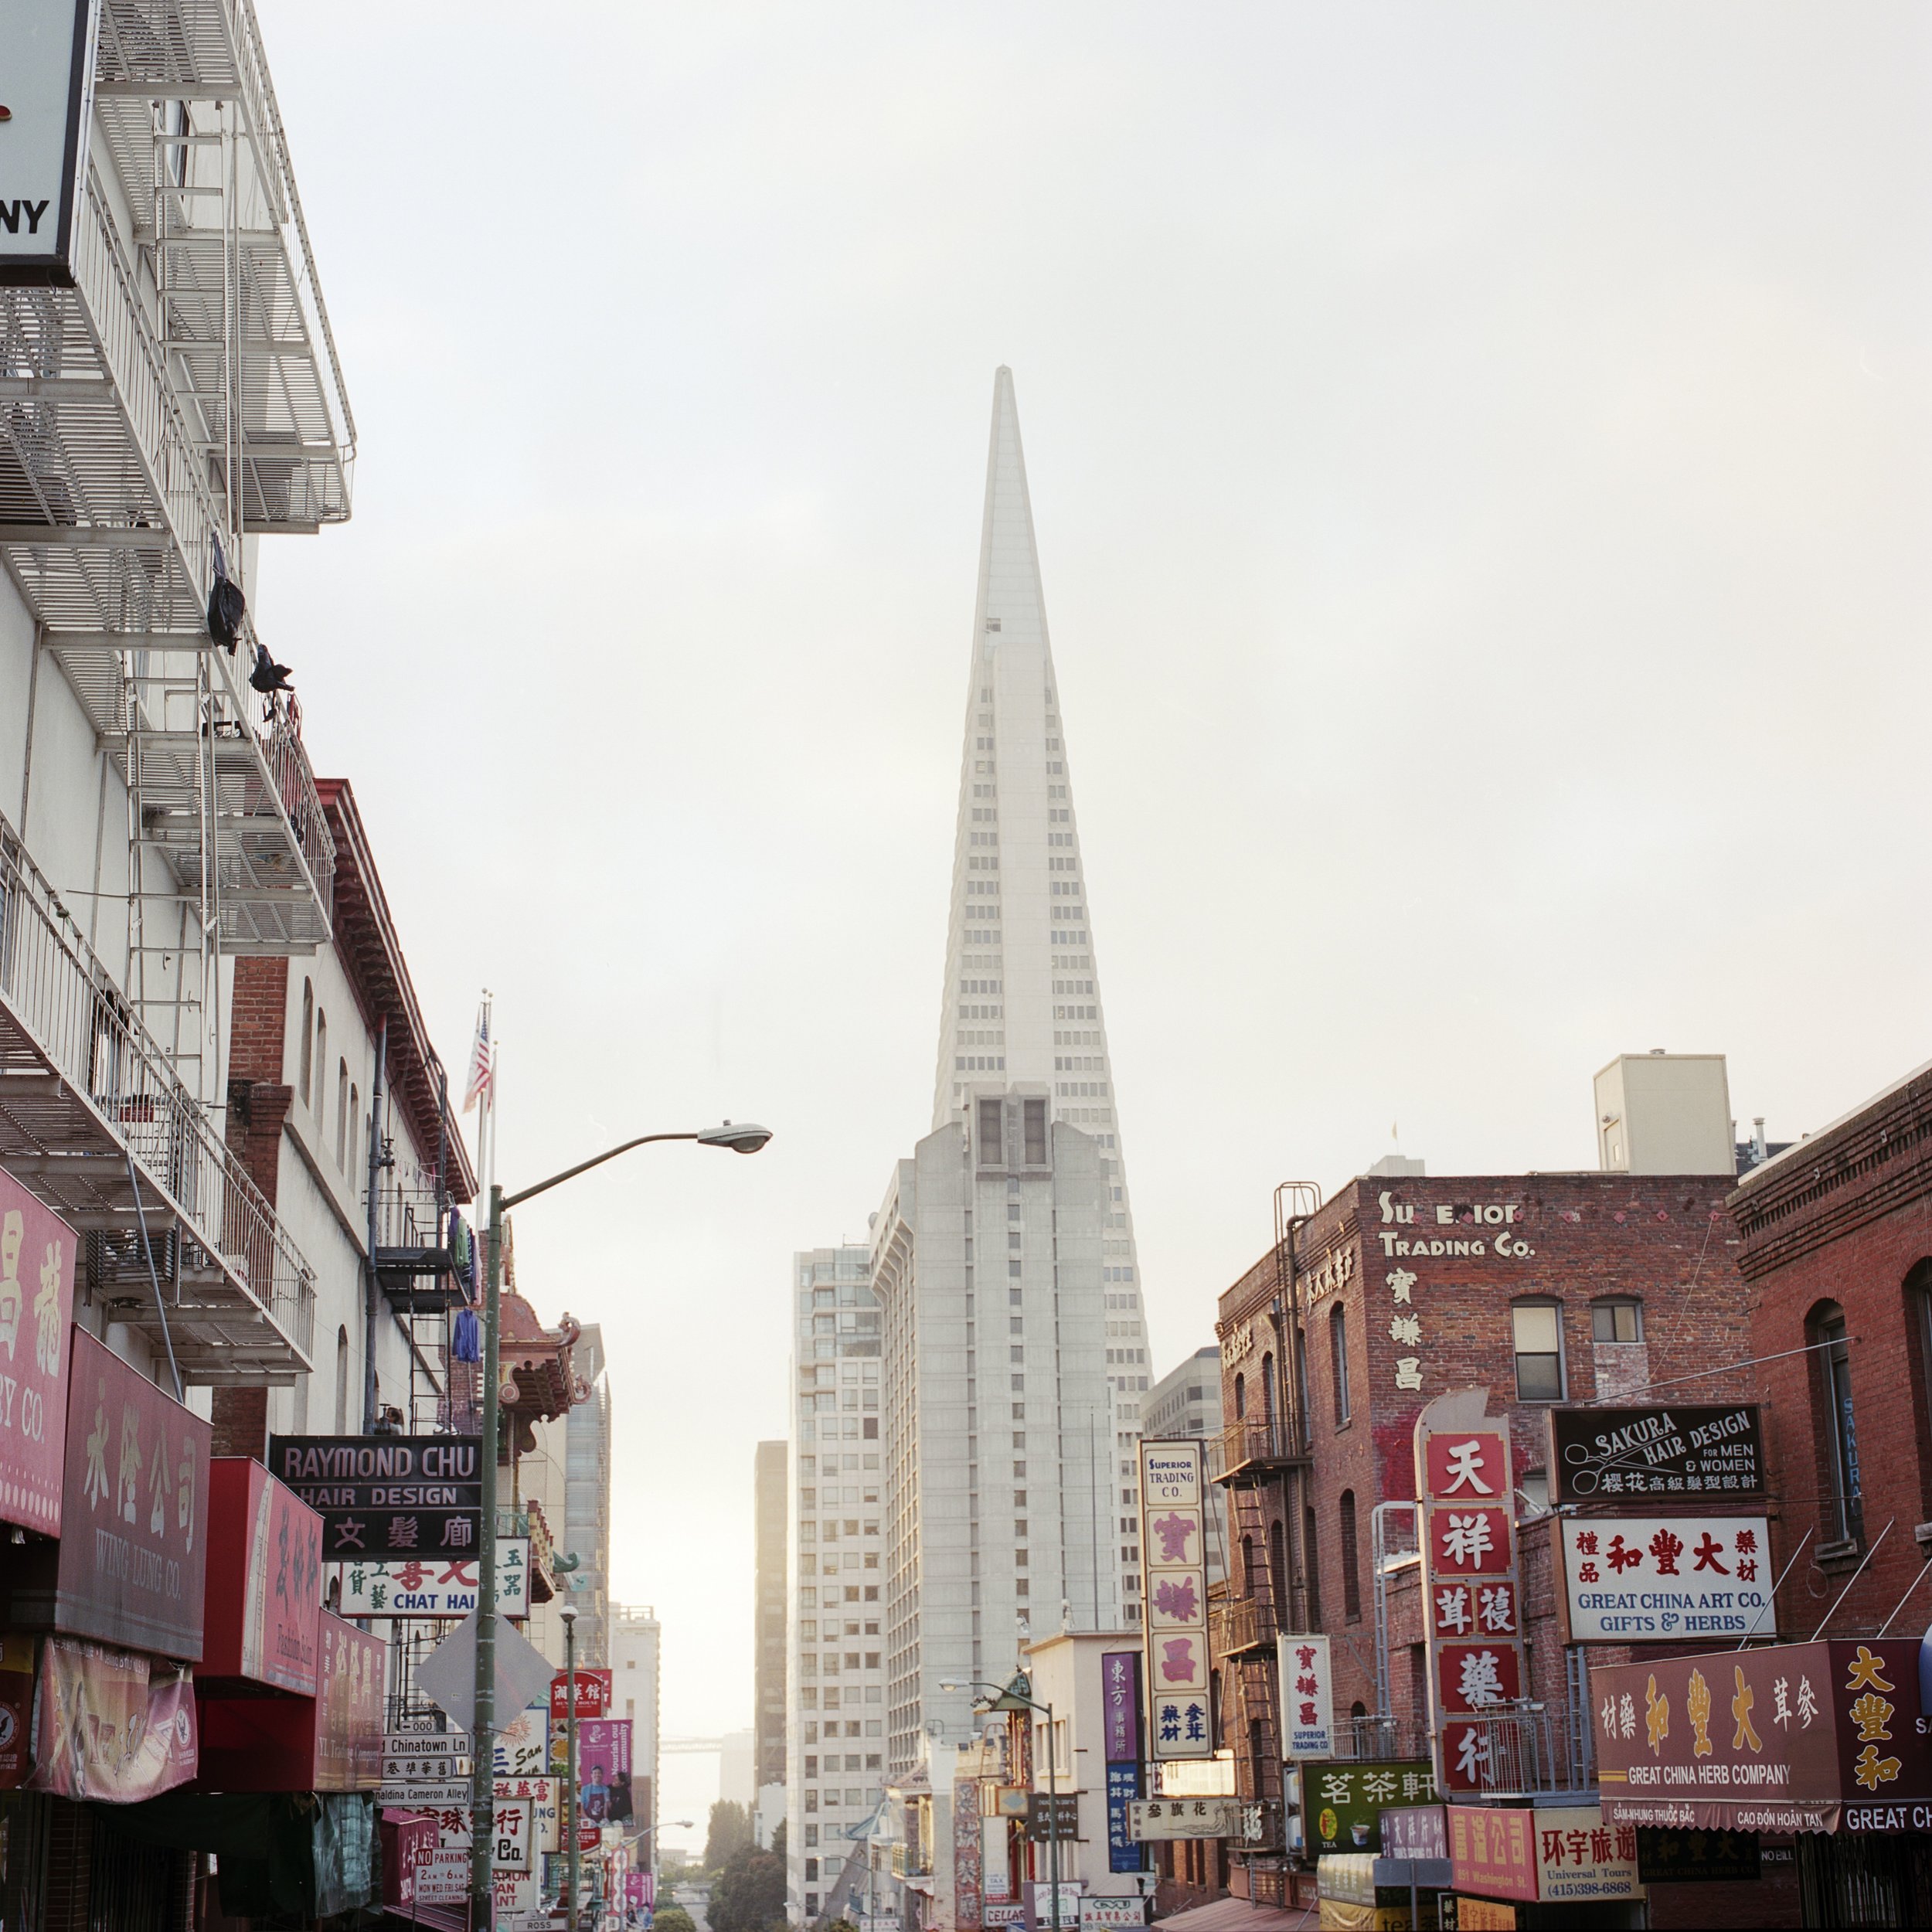
Kodak Portra 160 | Hasselblad 500cm | Silverfast 8.8 HDR Studio & Epson V700
This is the final image for my "Between the Light" book. Color balance is much warmer and towards yellow. Found this more appealing, but of course this is my personal interpretation of the negative.
The final jpeg scan does require some minor work in Adobe Lightroom in my opinion. I would god for a small perspective correction and some minor additional sharpening. Other than that I am quite happy with the scan.
Hope you enjoyed this short example!