A basic tutorial on how to scan Color Negative film with SILVERFAST and Photoshop
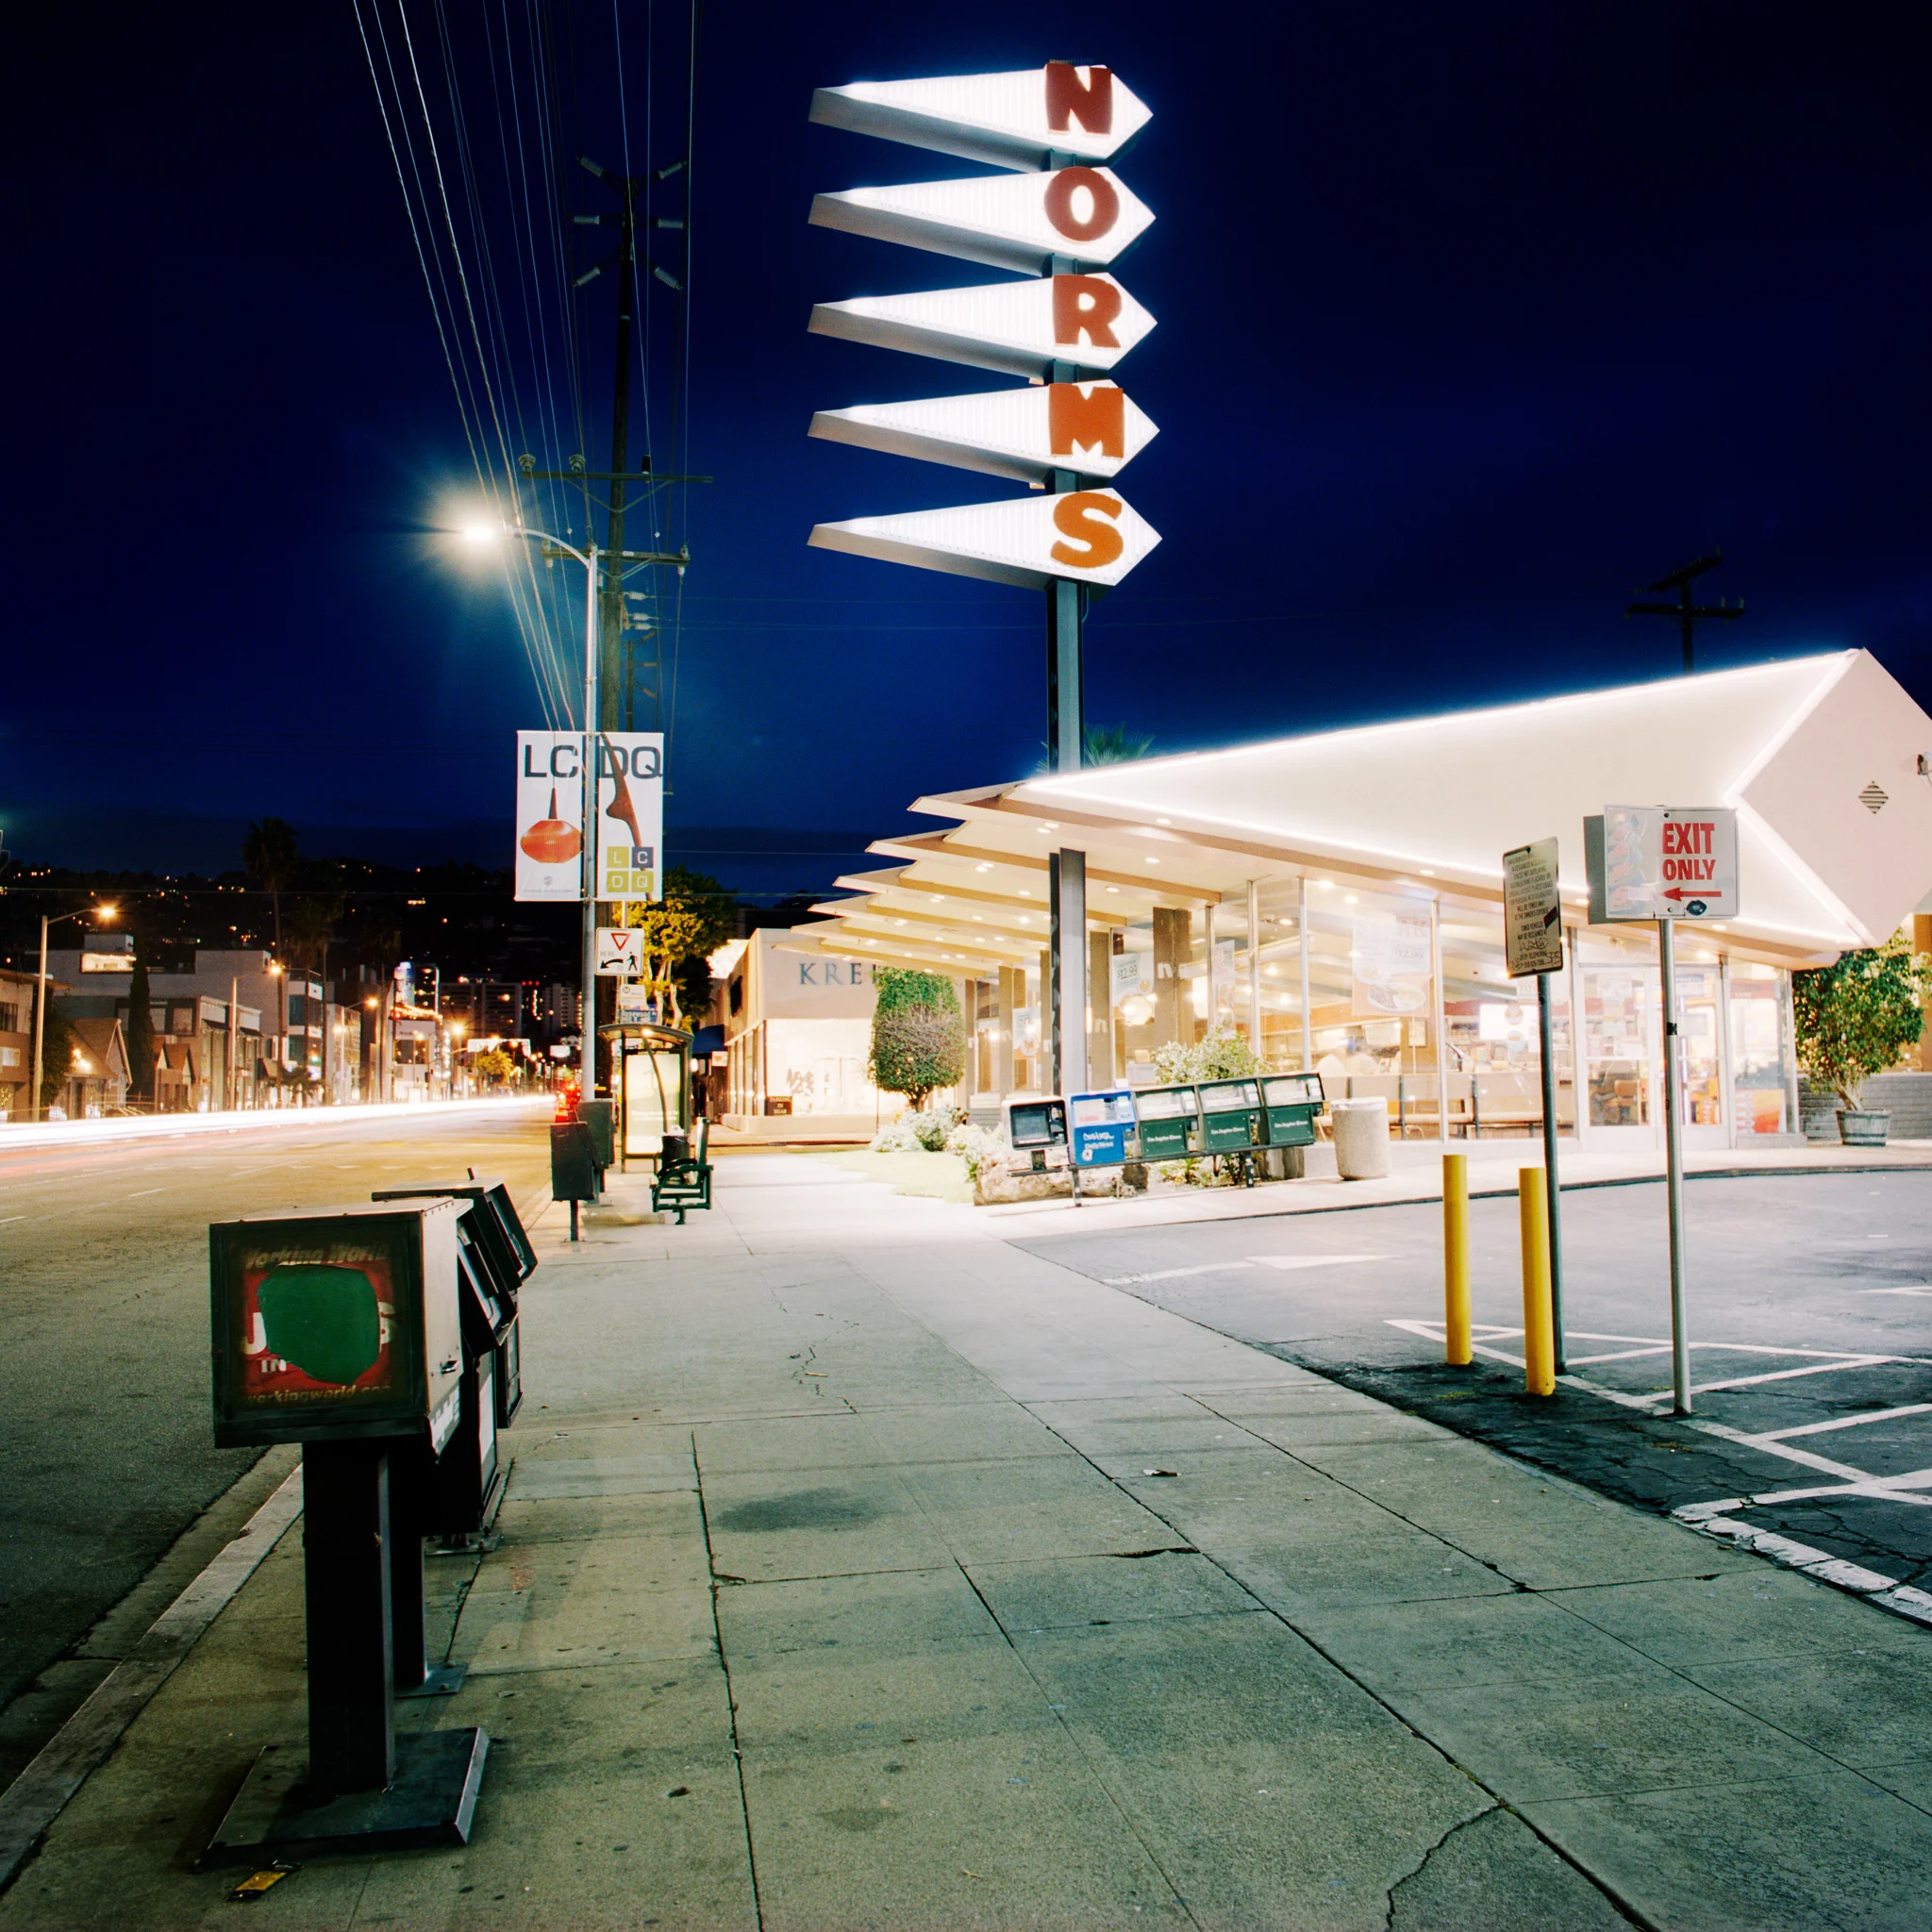
"NORMS - West Hollywood" is a night photograph I took a couple of weeks ago with my Hasselblad 500 and a Carl Zeiss 50mm Distagon f/4 lens of the famous NORMS restaurant in West Hollywood, Los Angeles. This will be part of a series of images focusing on the architecture of restaurants and shops in greater Los Angeles.
In this short tutorial I will show you how to make a good looking scan in just a few simple steps in SilverFast 8 and Photoshop. The aesthetics I try to achieve are similar to scans that my lab is doing with a Fuji Frontier mini-lab scanner. While the Epson V700 uses a significantly different technique, I am still able to re-scan some frames that look similar or close to the rendition of the aforementioned scanner.This is especially helpful if you need very high resolution files for large prints. The Fuji Frontier scanner normally runs out at around 3600px by 3600px for 6x6 negatives.
Part I - SilverFast
My basic idea of making scans at home is the following: you start with a rather flat and mostly unedited scan in the scanning software and use either Adobe Lightroom or Photoshop to fine tune it. This will give you the biggest freedom and the most pleasing results. Scanning color film comes with certain challenges that can be grouped into several aspects: contrast, color and detail.
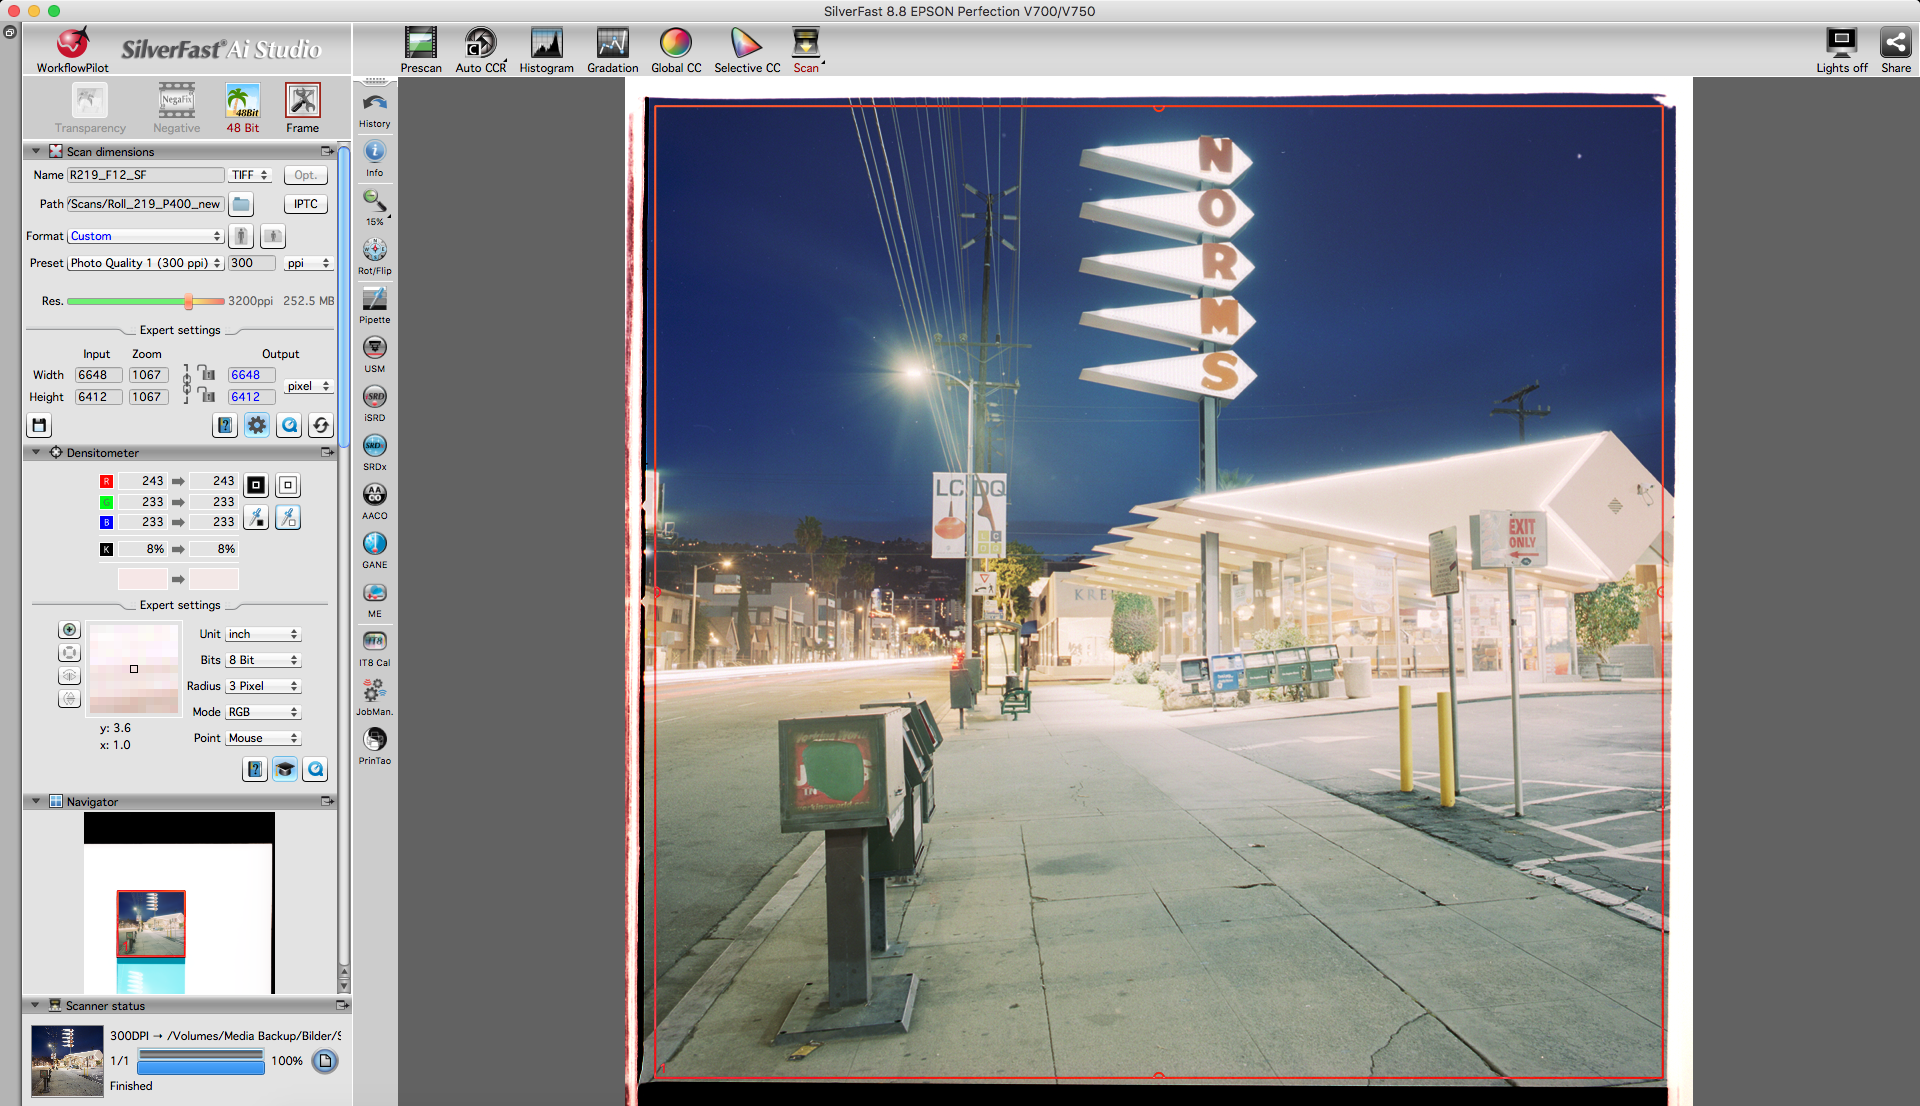
SilverFast 8 interface showing the basic adjustments I do when scanning
As mentioned in many of my previous blog posts on scanning, SilverFast is the best and most advanced software when working with home scanners. The interface allows you to apply several filters, make selections and basic image manipulation steps. There are literally thousand ways of how to achieve the final scan. Before anything else you need to make a pre-scan and select the scanning area by placing the red border inside the film area of the desired frame. It is quite important that you avoid the areas outside the frame such as the film border or scanning mask. This could lead to false color corrections applied by the basic algorithms of SilverFast that takes care of removing the orange mask.
SilverFast has basically all you need to make great scans within the software. But from time to time, depending on your preference, I think it is easier to achieve the desired results using Photoshop as a supportive software. That is why I only perform some basic steps in SilverFast and do the fine tuning in there.
Basic Scanning Preferences
- Input medium is set to "Negative" film
- Output bit depth is set to 48bit and TIFF is selected as file format
- For Epson V700/750 and V800/850 I set the resolution to 3200ppi, this is a bit beyond the maximum optical resolution but gives you the best results.
- I placed the scanning frame roughly inside the negative area as I will crop the file later in Photoshop
Negafix

- You can either choose the film profile for the film you are scanning or use the default mode as I did in this example. Both options will lead to good results.
- I rarely touch the Exposure slider and therefore I leave it at t the zero position
- There is one important rule for the Tolerance slider: go as far right without clipping your highlights. Watch the histogram closely when moving the slider.
iSRD
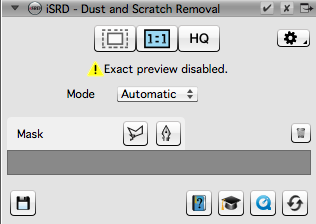
One of the biggest advantages of the SilverFast software is their unique and powerful detail rendering algorithms. The iSRD function will do an additional infrared scan that will be used to reduce artifacts from dust and scratches on the negative. You will get good results when using the auto mode for this filter. I will apply sharpening and noise reduction in Photoshop during the second step of the workflow.
GANE - Grain and noise elimination
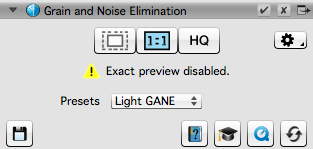
This nice little filter reduces mainly scanner noise that comes from the CCD sensor and, if applied at the lowest setting, it will not interfere with sharpening nor with beautiful grain rendering.
Multi Exposure - ME
With this option active a second scan will be performed that will be combined with the first scan. The exposure is slightly darker and therefore the final scann will show more dynamic range as well as less noise. For color negatives it will be as useful as for slides and this is why I keep it active, especially for dense negatives. Scanning time will however double.
With these minimum filter settings we are ready to scan the file and continue working on it in the next step.
Part II - Photoshop
After opening the file in Photoshop I used the crop tool to make a precise 1:1 crop before starting with any other changes.
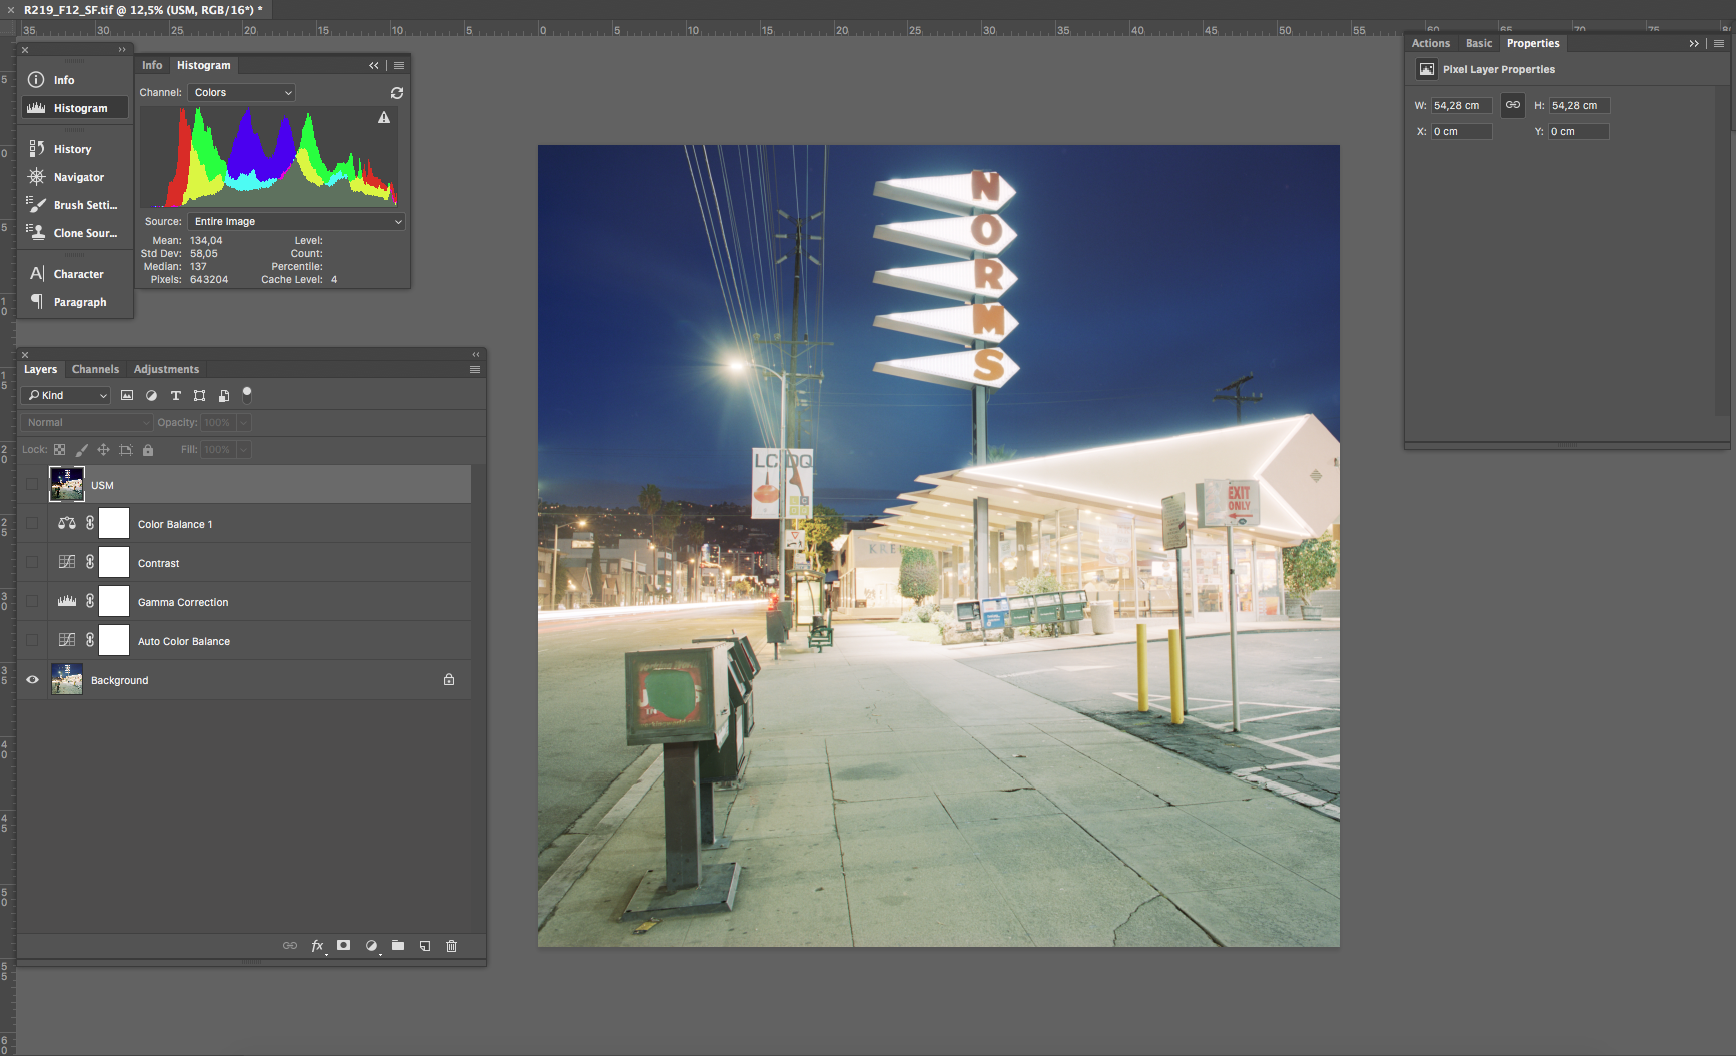
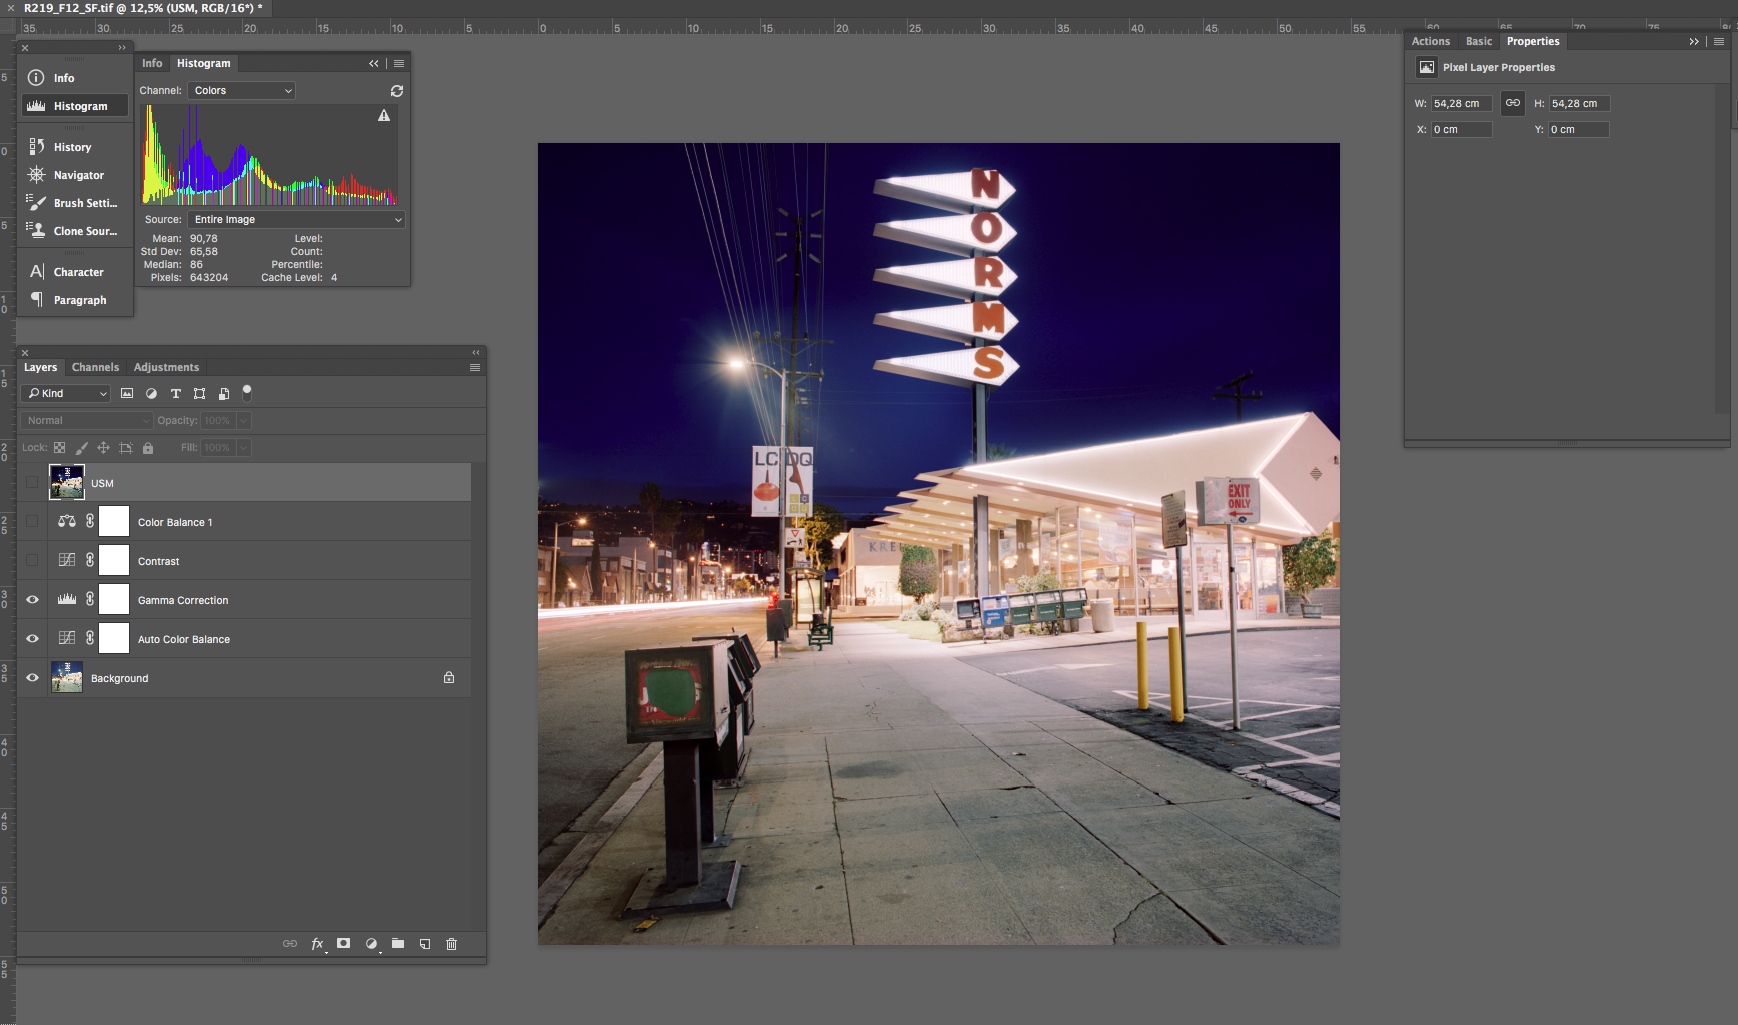
The scanned file from SilverFast with no changes applied except for cropping.
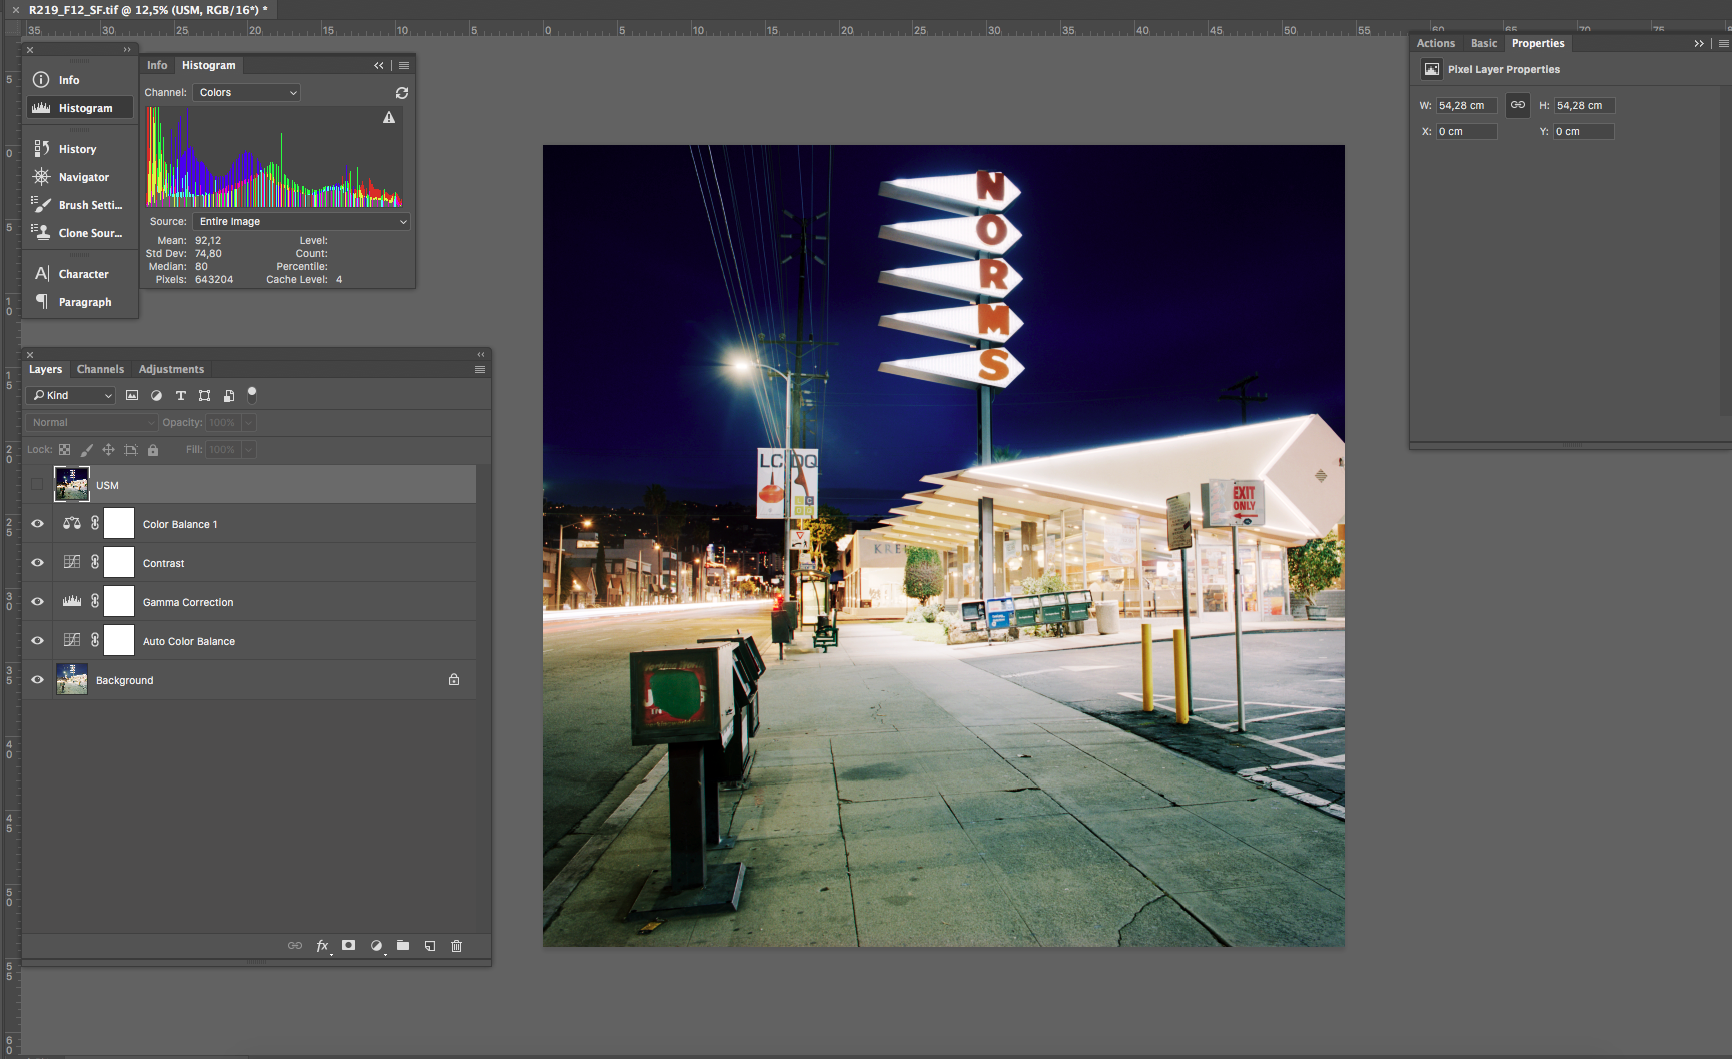
In the the screenshot of my layers palette you can already see what we need to do to the file. After opening the scan it looks rather flat and dull. While there is certainly a lot more we can do to the scan, color balance already looks quite nice. SilverFast has done its magic.. However there is a word of caution. Color balance is highly subjective and what looks good to my eye might be totally off for yours. Same is almost true for contrast. My idea for scanning film is simple: the final image needs to be convincing in order to prove its authenticity to the viewers eye. I have seen so many film scans that either lack good color balance or show too little contrast. This will result in a scan that seems awkward to the viewer. When scanning a negative that is originally designed for printing, we need to make sure the compressed tonal information that is held by the negative, will be reproduced believably. What normally happens when a photographic paper is hit by the light of the enlarger, needs to be done in the software now. There are no real rules neither any conventions. We can just try to please the eye and as a good reference Fuji and Kodak helped us years ago with how they build their scanners and how they reproduced the colors and contrasts of the negative.
AUTO CURVES correction
The first step in this workflow is optional, but in many cases very effective. It often gets you into the right direction and effectively removes color problems in a scan. Contrast will be changed here as well, but we will take special care of that in the next step.
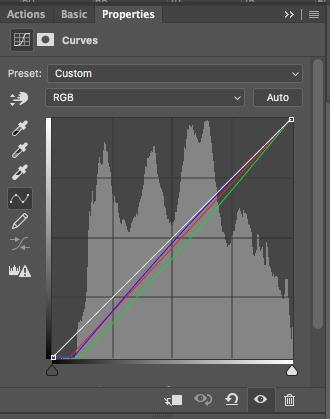
Add a CURVES adjustment layer and ALT / OPTION click on the AUTO button. Now you will have the choice on how the algorithm will modify the CURVES adjustment.
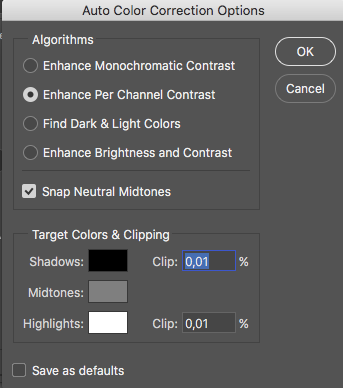
Most of the time I go with the ENHANCE PER CHANNEL CONTRAST and SNAP NEUTRAL MIDTOWNS option. FIND DARK & LIGHT COLORS could be another option. You will see a preview of the changes in the main window so you can judge your selection.
Alternate Color Correction
The AUTO Curves algorithm will get you into the right direction but as mentioned before the color settings can vary from person to person. I often use a basic COLOR BALANCE layer instead of the AUTO curves layer. You can get similar results using this method.
Levels - Gamma Correction
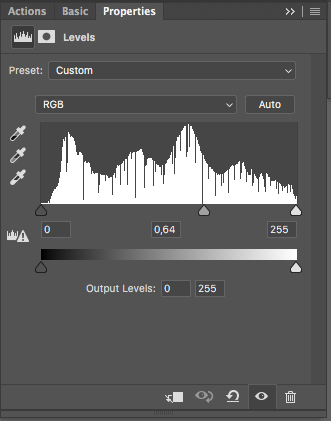
This will add a significant amount of contrast that is essential for a believable look of the final scan. Use a LEVELS adjustment layer and drag the middle slider to a value of approximately 0.75. This tool is often referred to as a gamma correction and most photographers use it that way. There are resources that claim it works differently to a real gamma corrections but in the end it does not really matter.
Here I decided to add even more contrast to match the look of the scan more to what the scene looked like when I was photographing it.
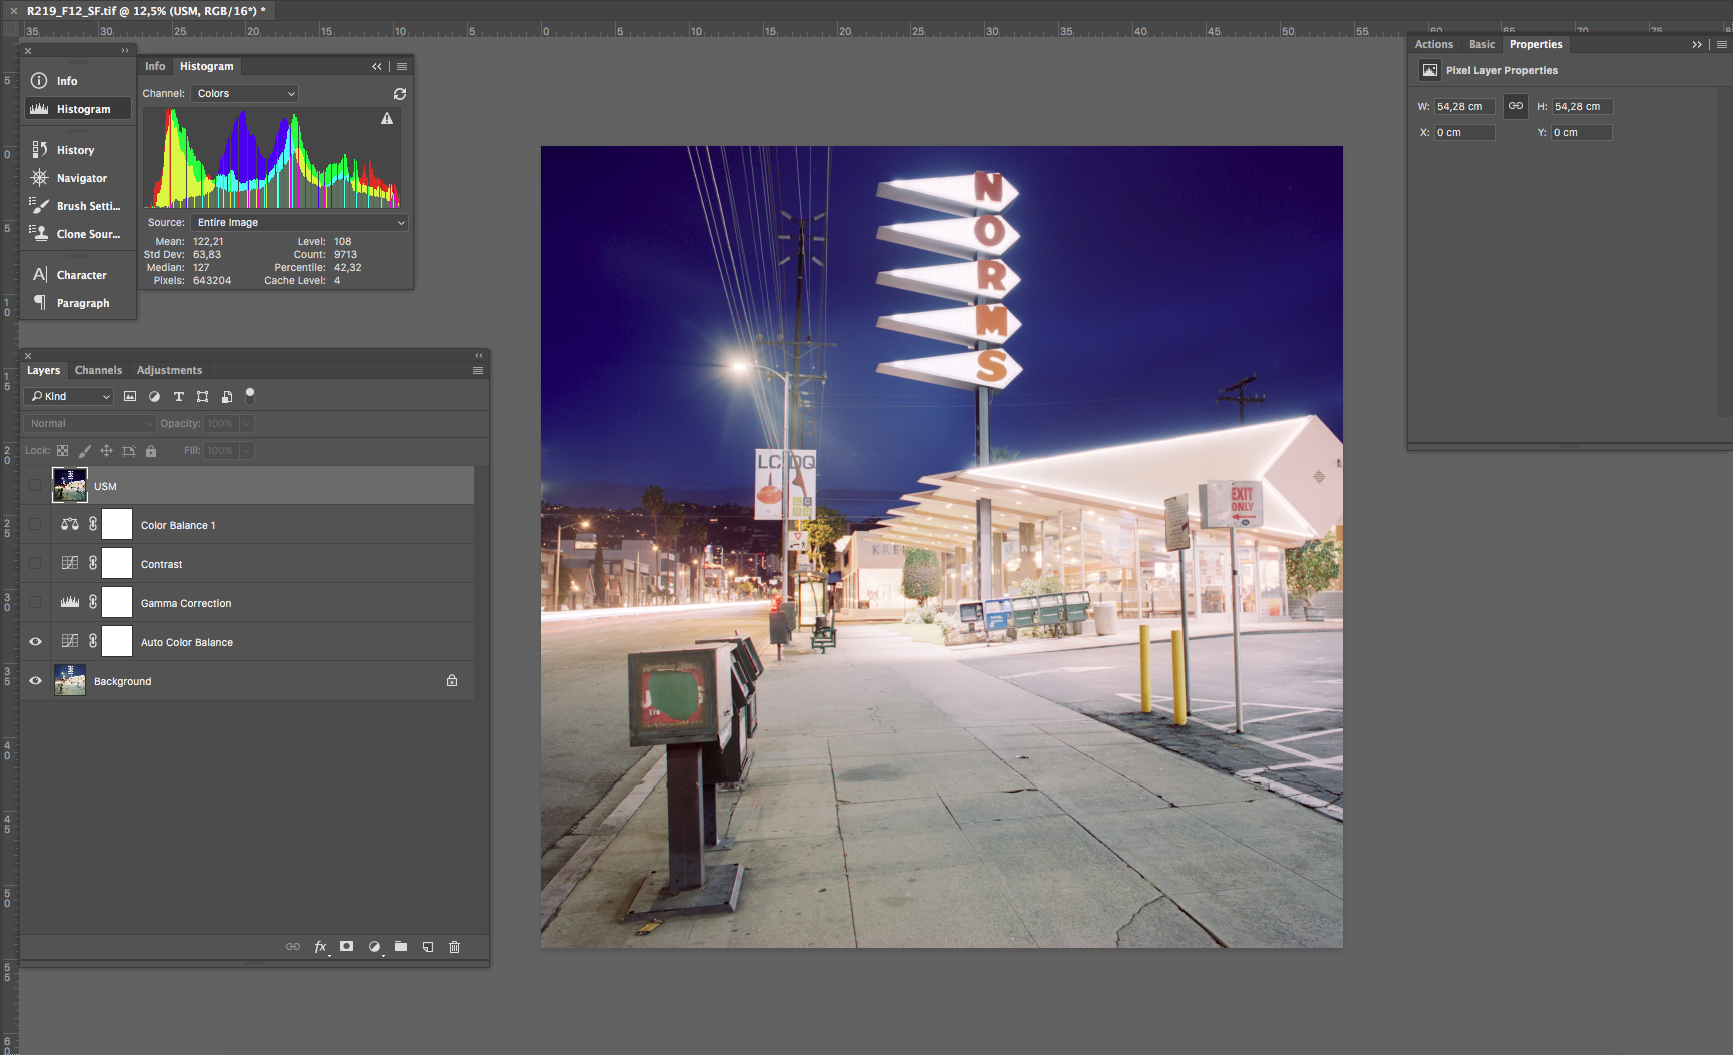
This is how the image looks after the gamma and initial color correction has been applied
Contrast
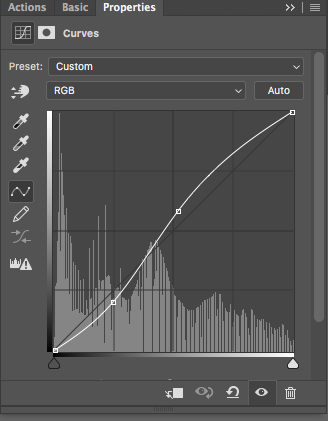
Now it is time to add a contrast curve using another CURVES adjustment layer. Depending on the desired looks and the overall captured scene contrast, it is important to select where the highest mid tone contrast falls. It is the steepest part of the curve. You can chose to move it into the shadows or midtones, lighten or darken the image, by placing it below or above the linear reference diagonal and fine tune the amount of contrast that is added, by altering the steepness of the curve.
What we should keep in mind is, with all the information that is in the negative we still need to distribute it into the limited available tonal range of the final output file. That means with a believable amount of contrast we might loose shadow or highlight detail. This could be recovered by local adjustments, similar to local dodging and burning in the darkroom, in an additional step of the workflow.
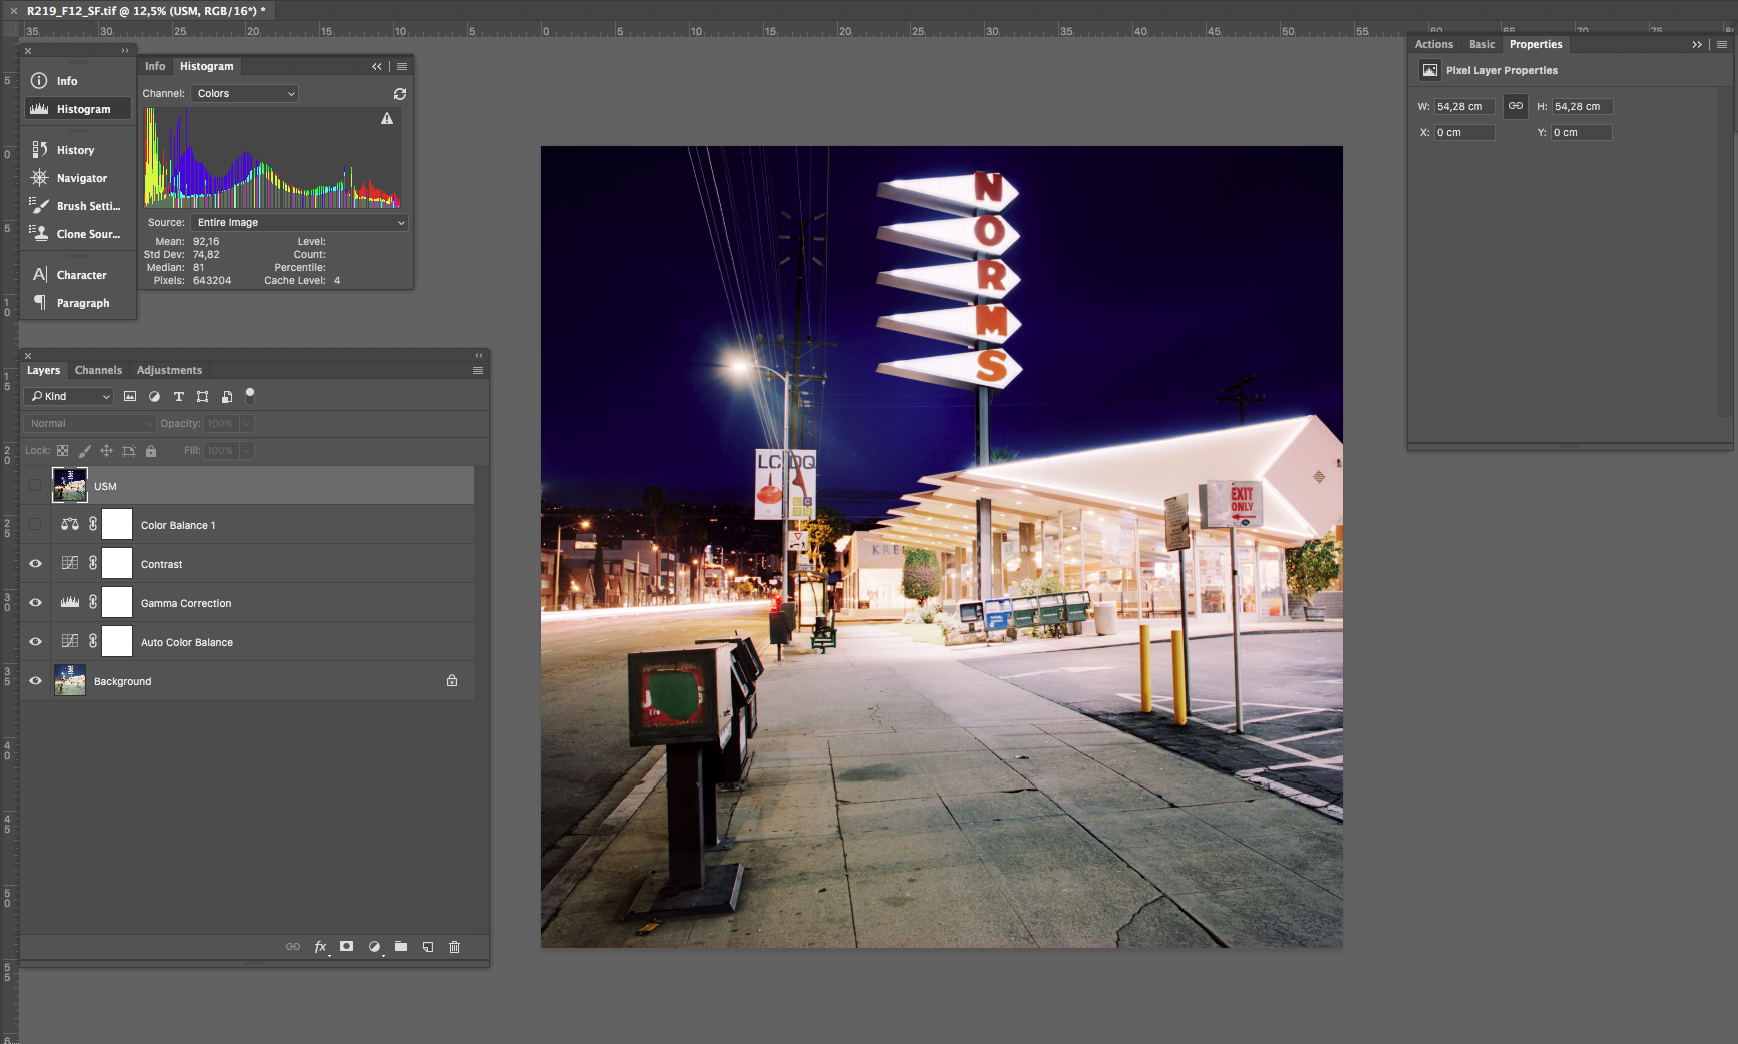
Now the contrast is very close to final look
Final Color Correction
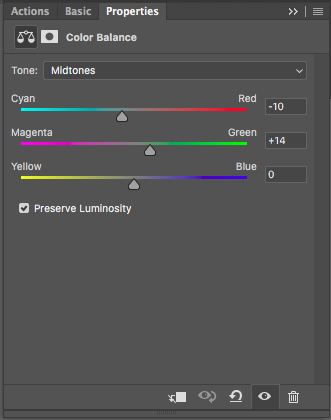
In this example I have used the AUTO CURVES tool, as shown in the first step of the workflow example. As this results in a slight magenta color cast I decided to add an additional COLOR BALANCE adjustment layer to the image to balance this. It would be also possible to solely rely on this adjustment for color balancing. To remove a color cast, you simply add the complementary color. In this case I added GREEN and CYAN.
This step moves a residual magenta color cast
UNSHARP MASK
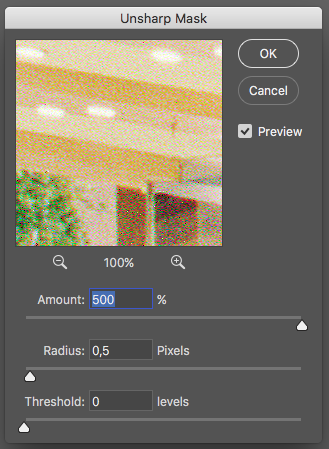
Last but not least it is time to sharpen the file to compensate for a loss in sharpness that is normal for the scanning process. I use a simple unsharp mask filter. Before we can do that we need to combine all the layers to a single layer on top of all adjustments.
There is a keyboard short cut to do this: CMD OPT SHIFT + E. I borrowed the USM settings from a nice blog post on an Epson vs. Hasselblad Felxtight comparison. I think these settings perfectly work with high res files from the Epson V700 (3200ppi).
In the screenshot you see that the GAIN feature of SilverFast did not remove all of the color noise from the scanner. An optional step would be removing this with any kind of noise filter, either in Photoshop or any other software. I often do this when I do my local adjustments in Adobe Lightroom.

100% view to check for good detail rendering
Conclusion
Below you see the final scan with my personal interpretation. It is close but not identical withe film scan from MeinFilmLab. I do think it is very interesting to scan the files again at home. This could be used for a really big print as the resolution is huge with almost 6800 x 6800px and a very nice detail rendering. I also have more freedom to apply selective adjustments to the image.
I really hope this was helpful for you and maybe you can use some of the steps when scanning your own work. Even though I specifically mention my Epson V700 scanner, most of the steps could be replicated with any other scanner.
Have fun and happy scanning!