
The Digitaliza 120 Film Mask from Lomography
My Mounting Solution for a flatbed Scanner
I have tried many mounting solutions for my Epson flatbed scanner and I was never happy with the results. Some solutions use additional glass and all of them reduce sharpness by a certain level. They deal with curled film quite nicely, but the loss of sharpness is not acceptable in my opinion. This is why I continued to use the original holders for quite a while. I still think they are the cheapest solution for good results. Handling can be a bit difficult though. By coincident I stumbled upon the Digitaliza 120 film mask and as I used a 35mm Digitaliza before I thought I would give it a try. After some experimentation I discovered that I can increase scan sharpness by increasing the distance between the scanner glass and the film. I made a 2mm thick rubber support for the Digitaliza and my scans immediately looked much better. It took me several test scans to find the optimum height. The 120 Film Mask is now my go to solution for mounting 120 film on a flatbed scanner.

The Hasselblad Mask
I have written about scanner banding several times on my blog. It still bothers me. For some reason the exposed area of the film taken with a Hasselblad 500 is a tiny bit smaller than from other cameras. This leaves a little gap between the holder and the exposed area of the film. Light shines through this gap and will be reflected from the upper glass of the flatbed scanner. The results are ghosts and vertical streaks along the scan that are also known as scanner banding or staircase effect. The best solution to reduce this effect is to additionally place a cardboard mask on the film that shields the light and prevents flare. You can easily make a mask by cutting out some black cardboard at the correct size.

Cardboard mask in place.

A magnet cover will prevent film from curling.

Last step of the mounting process is to remove the magnet.

Film in the holder withe the Hasselblad mask in place.
How it Works
The Lomography Digitaliza is a smart system. The Scanning Mask consists of three parts: the holder itself, a metal support that holds the film in place during mounting and a magnet cover that prevents the film from curling.
- When mounting film you need to remove the magnet first and than open the holder. Film can now be placed inside the holder. Alignment is made easy by some small plastic guides. The metal support will allow the film to lay flat in the holder.
- Next step would be the optional Hasselblad mask, which you obviously don´t need if you shoot with other cameras.
- The magnet cover will be placed on the film and small pins will hold the magnet in place. Together with the metal support perfect flatness of the film will be ensured.
- Now you can close the holder and other magnets which are placde around the frame will tightly close the system.
- Last but not least you can remove the magnet and your film will be ready for scanning. Most of the film will be perfectly flat after this procedure but I found that some film tend to bend slightly. Sometimes re-doing the process of mounting will help to correct this bending, but for some reasons some film are harder to mount correctly than others.

Placing The Support and the Digitaliza on the Scanner
The Digitaliza Film Scanning Mask is of course a generic mask that is supposed to be used with all kind of flatbed scanners. Most of them have a fixed focus system and the in-focus area is somewhere above the scanner glass. It is very important to determine the location of this in-focus area. There is a certain level of depth of field available but you need to make sure you place the film inside this depth of field of the scanner lens. I found the Digitaliza Film Scanning Mask places the film too close to the glass and therefore I made a support solution that increases the height of the scanner mask. This support is made of a rubber or foam board that could be easily cut to the desired outlines. I increased the distance between the mask and the scanner glass by approximately two millimeters. This works perfectly. You need to make several test scans progressively increasing the distance to determine the optimum height. This effort is crucial and tedious but worth the effort., Your scans will be perfectly sharp and the Digitaliza Scanning Mask will hold the film nicely in place.
The self-made rubber support on the scanner glass.

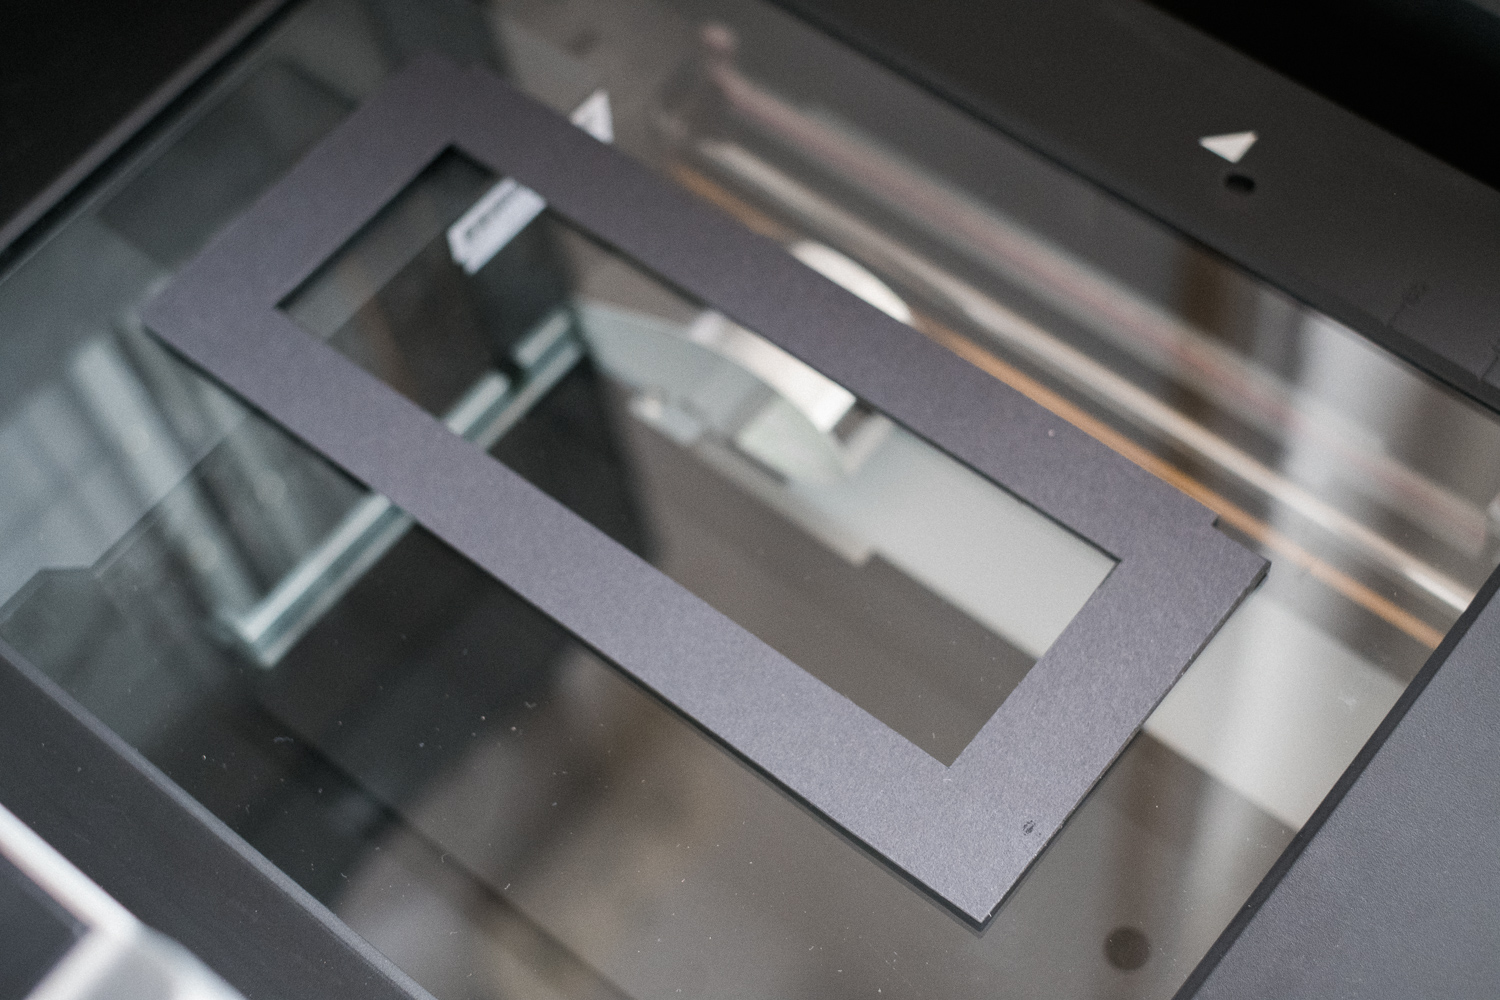
The scanning mask placed on top of the support.
Summary
The Lomography Scanning Mask is by far the easiest way of mounting film on a flatbed scanner. The price tag is OK in my opinion as the build quality seems rather good. The solution Lomography came up with is quite unique and successful. Most of my films scan perfectly flat. For me it is the best mounting solution available. However you need to do some extra work and find the perfect height fo the scanner mask. This homework needs to be done in order to have the mask perform as it should be. If you are willing to invest some time for this procedure you will be more than happy with the mask and your scans.